(DIY) Envelope Pillow Cover
Last week I shared with you my first little sewing project since getting my sewing machine.
Today I'm going to share a second project I did last weekend.
Envelope pillow covers.

I've been wanting to try and make these for quite sometime so I was excited when the first one I made actually turned out! The fabric I used is a type of linen fabric that I found on sale when I got this fabric. It worked out perfect for trying this project out for the first time.
Overall, I found this quite easy to make and because I am new to sewing {and probably slow compared to some people} it took me about 20-30 minutes to make & that included cutting out the fabric, too. That's probably kind of slow but really, it didn't take that long. I found it to be a relatively quick project & I'm sure the more I make the faster I'll get {because I definitely plan to make more!}.
Maybe you've already mastered the envelope pillow cover but, for those of you that haven't, and would like to learn how, here's what I did...

Step 1: Take the pillow you are wanting to cover and measure it. The pillow I made the cover for measured 19"x19". Once you have measured your pillow add an inch to each side measurement {this will ensure you have enough space to sew the pieces together}. So in the end, the measurements end up being 20"x20".
Cut out ONE piece of fabric this size {20"x20"}.
Next cut out another piece of fabric measuring 20"x28" {so you're adding 8 inches to one side. If you want you can add anywhere between 8-10 inches depending on how big of a hem you want for the overlap - you will see what I mean when you read further. I went with 8" for this project}.
Once you have your second piece of fabric cut out {for me it was the 20"x28"} then cut that piece in half. You should now have three pieces of fabric total: 2 the same size from the piece you just cut in half and the very first piece of fabric you cut.
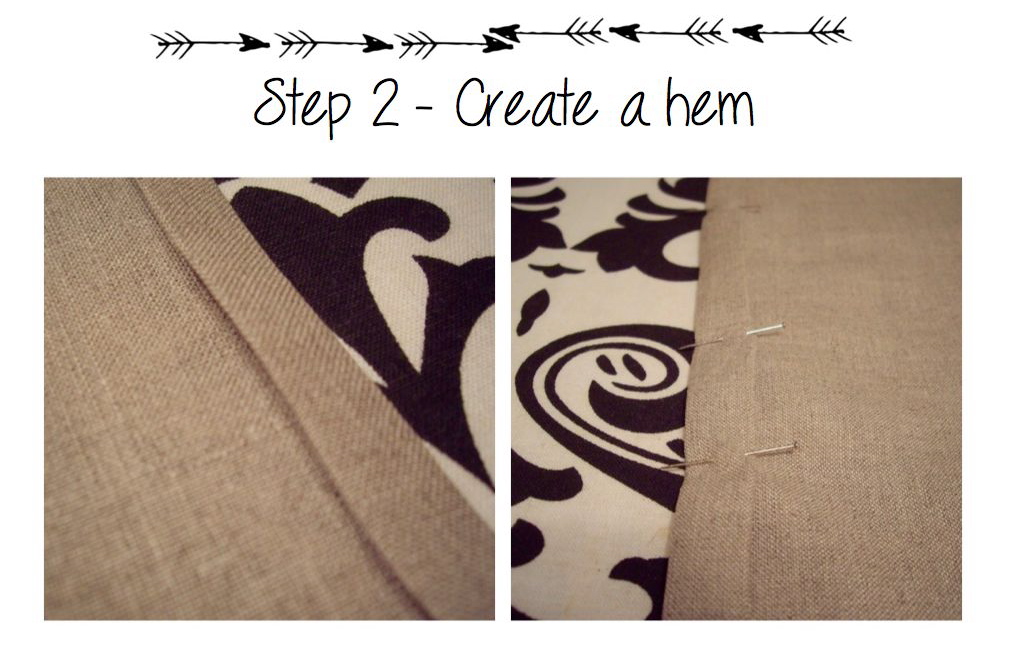
Step 2: Next you need to create a hem on the 2 pieces of fabric that are the same size.
Print side down {so, wrong side facing up} fold over 1/4 inch on 1 long side of both pieces. Then fold over again so you have a nice clean hem {see photo above}. Once folded over give it a quick iron so that the fabric stays and then pin in place.
*Note - if you decided to add more than 8 inches {see step 1} you'll have more room for a bigger hem. Say, 1/2 inch to an inch - use your judgement*
Next - sew your hem on both pieces usuing your sewing machine.


Step 4: Pin the overlapped pieces together & then get sewing around the border of all 4 sides {Take the pins out as you get to them!}.

Step 5: Once you have sewn around the outer edges of your cover turn it inside out and then insert your pillow. Now you're done!
You now have an envelope pillow cover. That wasn't too hard, was it?
Mine is a little bit plain but I have plans to spruce it up & when I do I'll be sure to share!
Hope you all have a wonderful weekend!
-----------------------------------------------------------------------------------
If anyone has any questions about making the pillow cover shoot me an e-mail or ask away in the comment section - I got a little wordy and my instructions may have got a bit confusing!
PS - My inspiration for this project came from here & here.
Print side down {so, wrong side facing up} fold over 1/4 inch on 1 long side of both pieces. Then fold over again so you have a nice clean hem {see photo above}. Once folded over give it a quick iron so that the fabric stays and then pin in place.
*Note - if you decided to add more than 8 inches {see step 1} you'll have more room for a bigger hem. Say, 1/2 inch to an inch - use your judgement*
Next - sew your hem on both pieces usuing your sewing machine.


Step 3: Next, take the first piece of fabric you cut {the one that measured 20"x20" for me} and lay it on your surface {or floor, in my case} print side up. Then take one of your smaller pieces and lay it, print side down, on top of the 20"x20" piece. You'll notice in the first photo that it clearly doesn't cover the entire first piece of fabric. Next take your last piece of fabric and align it on the other side so that it overlaps the first piece, again, print side down. Be sure that your hems are in the center of your pillow as shown above.

Step 4: Pin the overlapped pieces together & then get sewing around the border of all 4 sides {Take the pins out as you get to them!}.

Step 5: Once you have sewn around the outer edges of your cover turn it inside out and then insert your pillow. Now you're done!
You now have an envelope pillow cover. That wasn't too hard, was it?
Mine is a little bit plain but I have plans to spruce it up & when I do I'll be sure to share!
Hope you all have a wonderful weekend!
-----------------------------------------------------------------------------------
If anyone has any questions about making the pillow cover shoot me an e-mail or ask away in the comment section - I got a little wordy and my instructions may have got a bit confusing!
PS - My inspiration for this project came from here & here.
*I've linked this project to: Flamingo Toes & C.R.A.F.T.
Great job! It looks awesome!
ReplyDeleteThanks! :)
DeleteGreat tutorial! I'll have to try this one, too. New to sewing and I like how this project is simple.
ReplyDeleteThanks Audra! Let me know if you try it out, I'd love to see!
Delete